Installing the Ingenico Lane 3000
To install the Ingenico Lane 3000 PIN Pad, follow these steps:
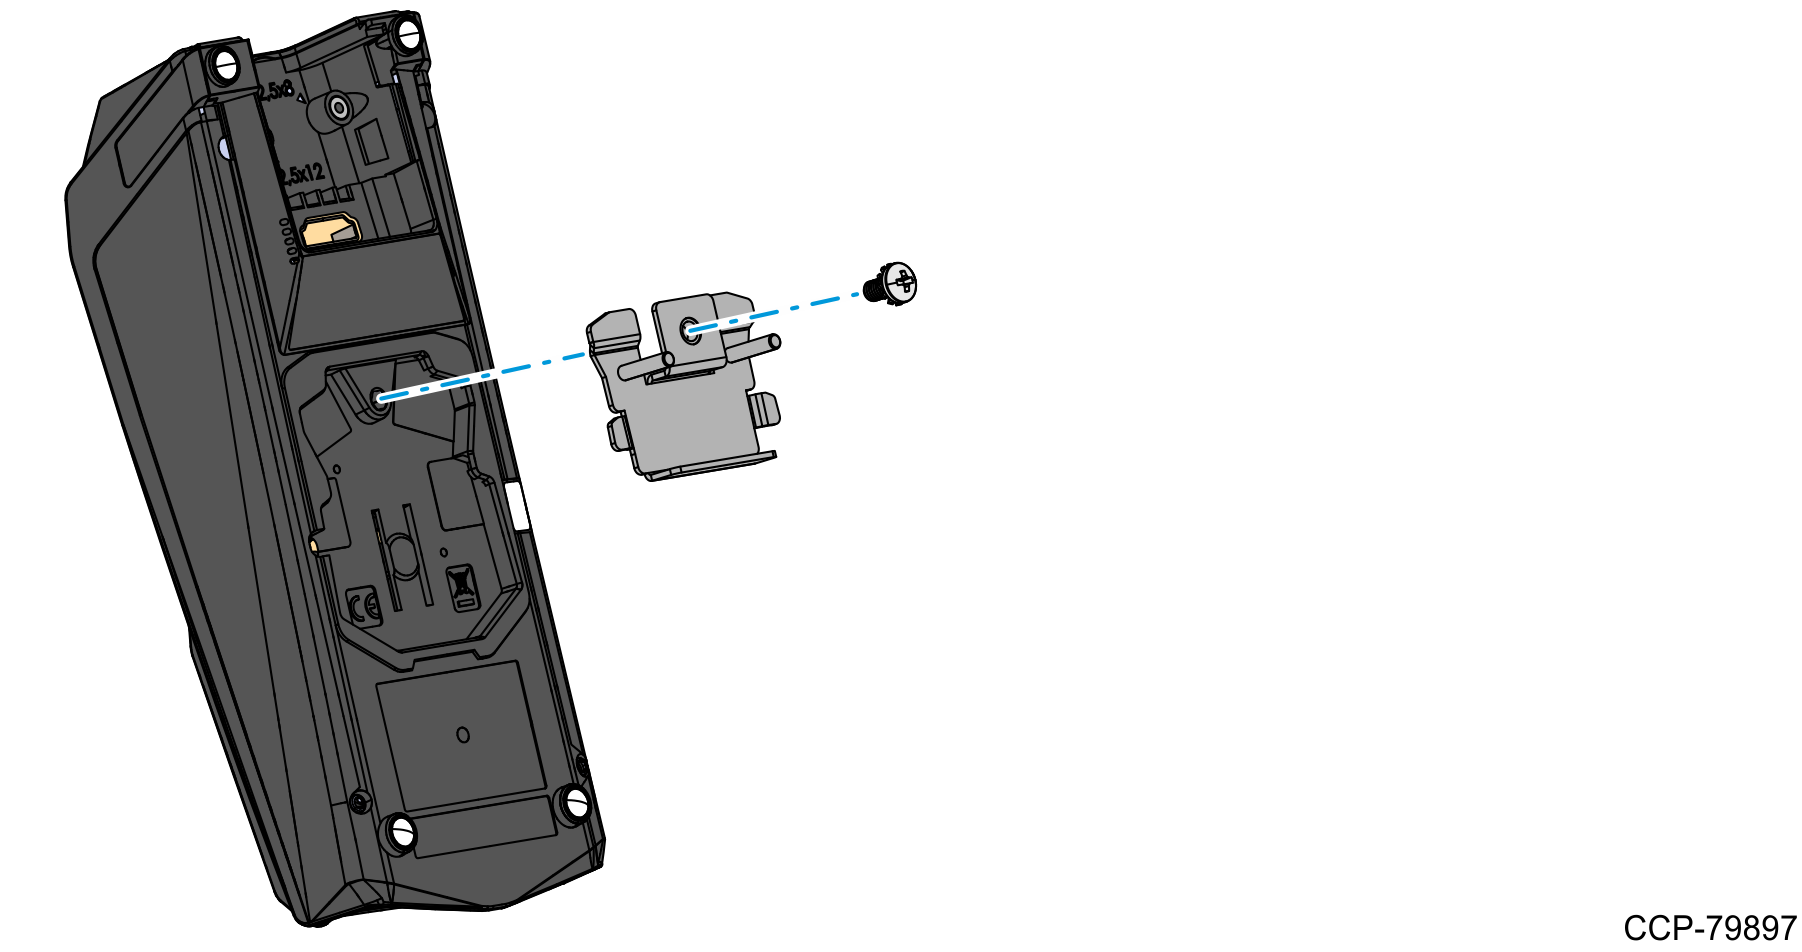
1.Install the Metal Adaptor to the back of the PIN Pad and secure the Metal Adaptor using an M4X8 pan head screw.
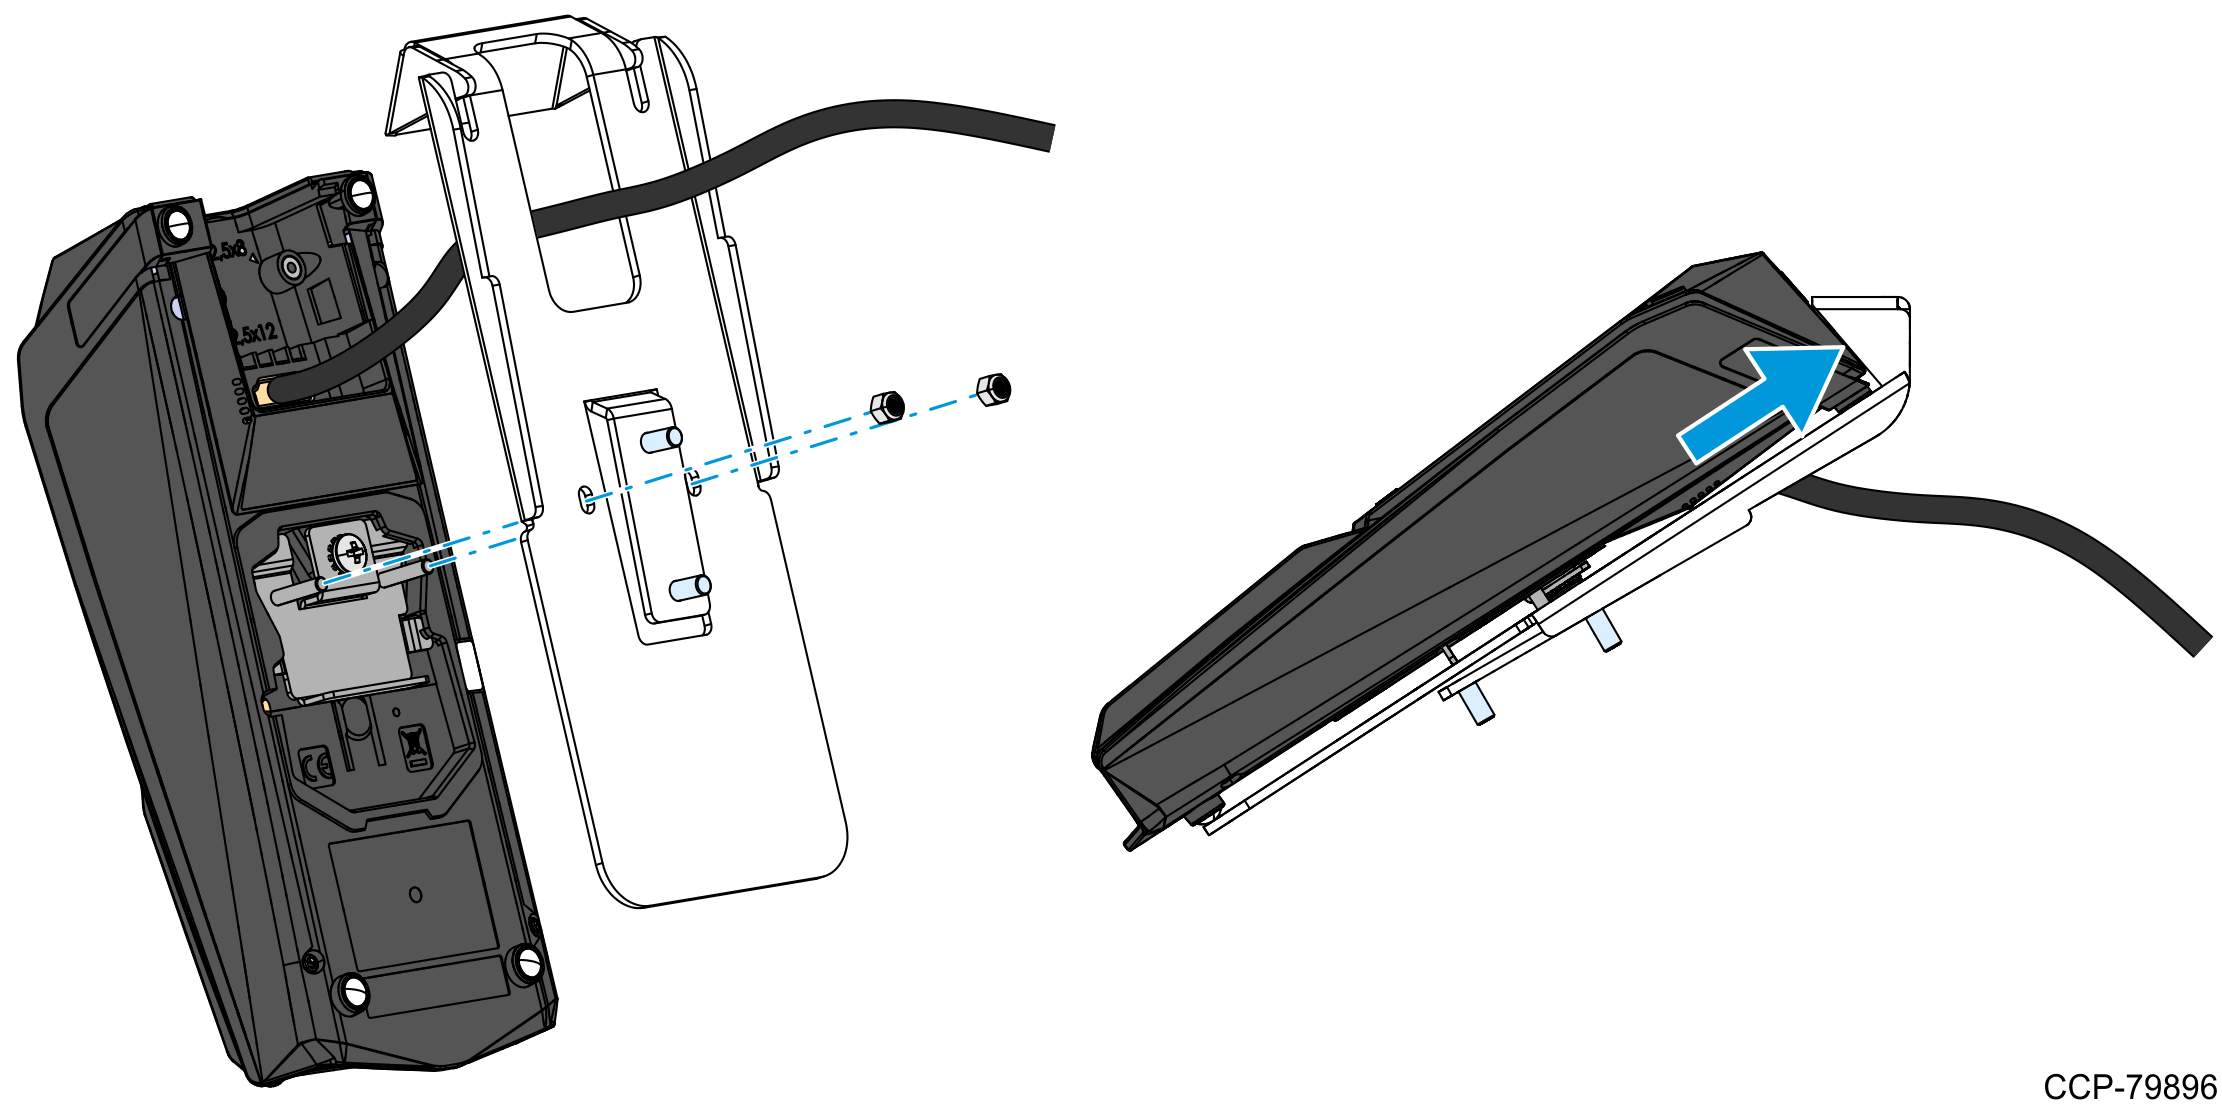
2.Install the PIN Pad on the mounting bracket.
Caution: Ensure that the PIN Pad Cable is not pinched.
a.Connect the PIN Pad Cable to the PIN Pad device.
b.Insert the PIN Pad Cable through the cable access hole on the PIN Pad Mounting Bracket.
c.Insert the mounting studs of the Metal Adaptor into the mounting holes on the mounting bracket.
d.Push the top of the PIN Pad up against the hood of the mounting bracket.
Note: Ensure that the PIN Pad properly fits below the hood.
e.Secure the PIN Pad to the mounting bracket using two M3 locknuts.
3.Insert the PIN Pad Cable into the cable access hole on the Payment Device Support Bracket.
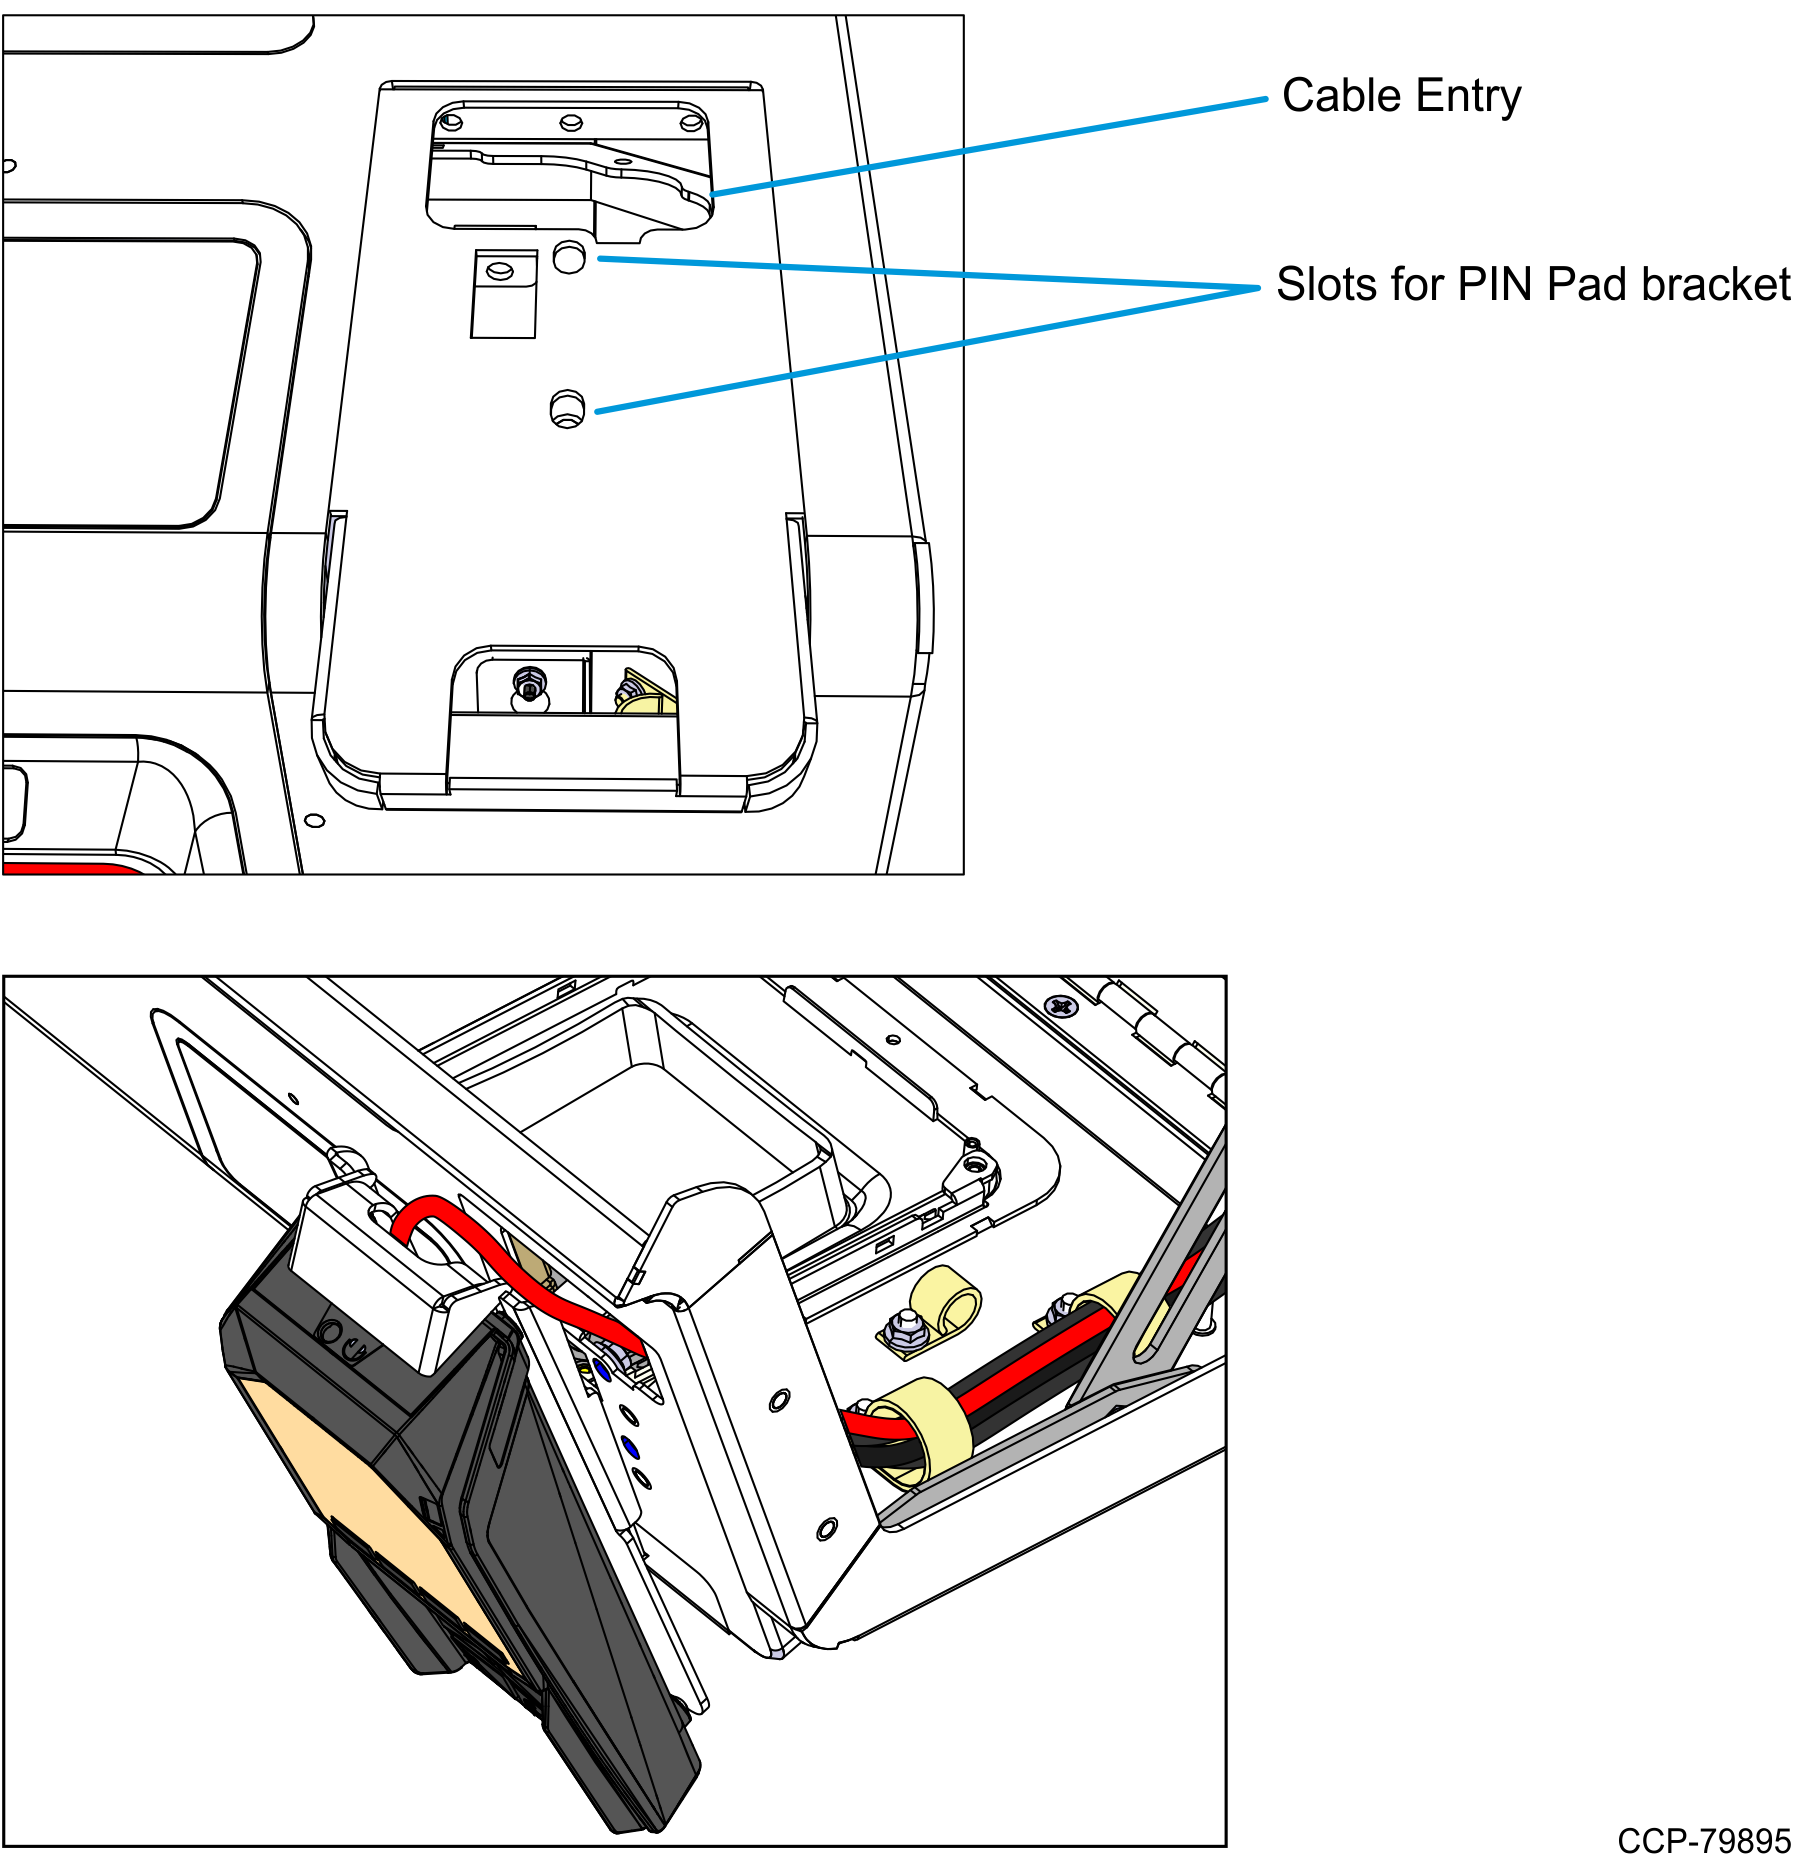
4.Install the PIN Pad Assembly onto the kiosk.
Caution: Ensure that the PIN Pad Cable is not pinched.
a.Insert the two studs on the back of the mounting bracket into the mounting holes on the Payment Device Support Bracket.
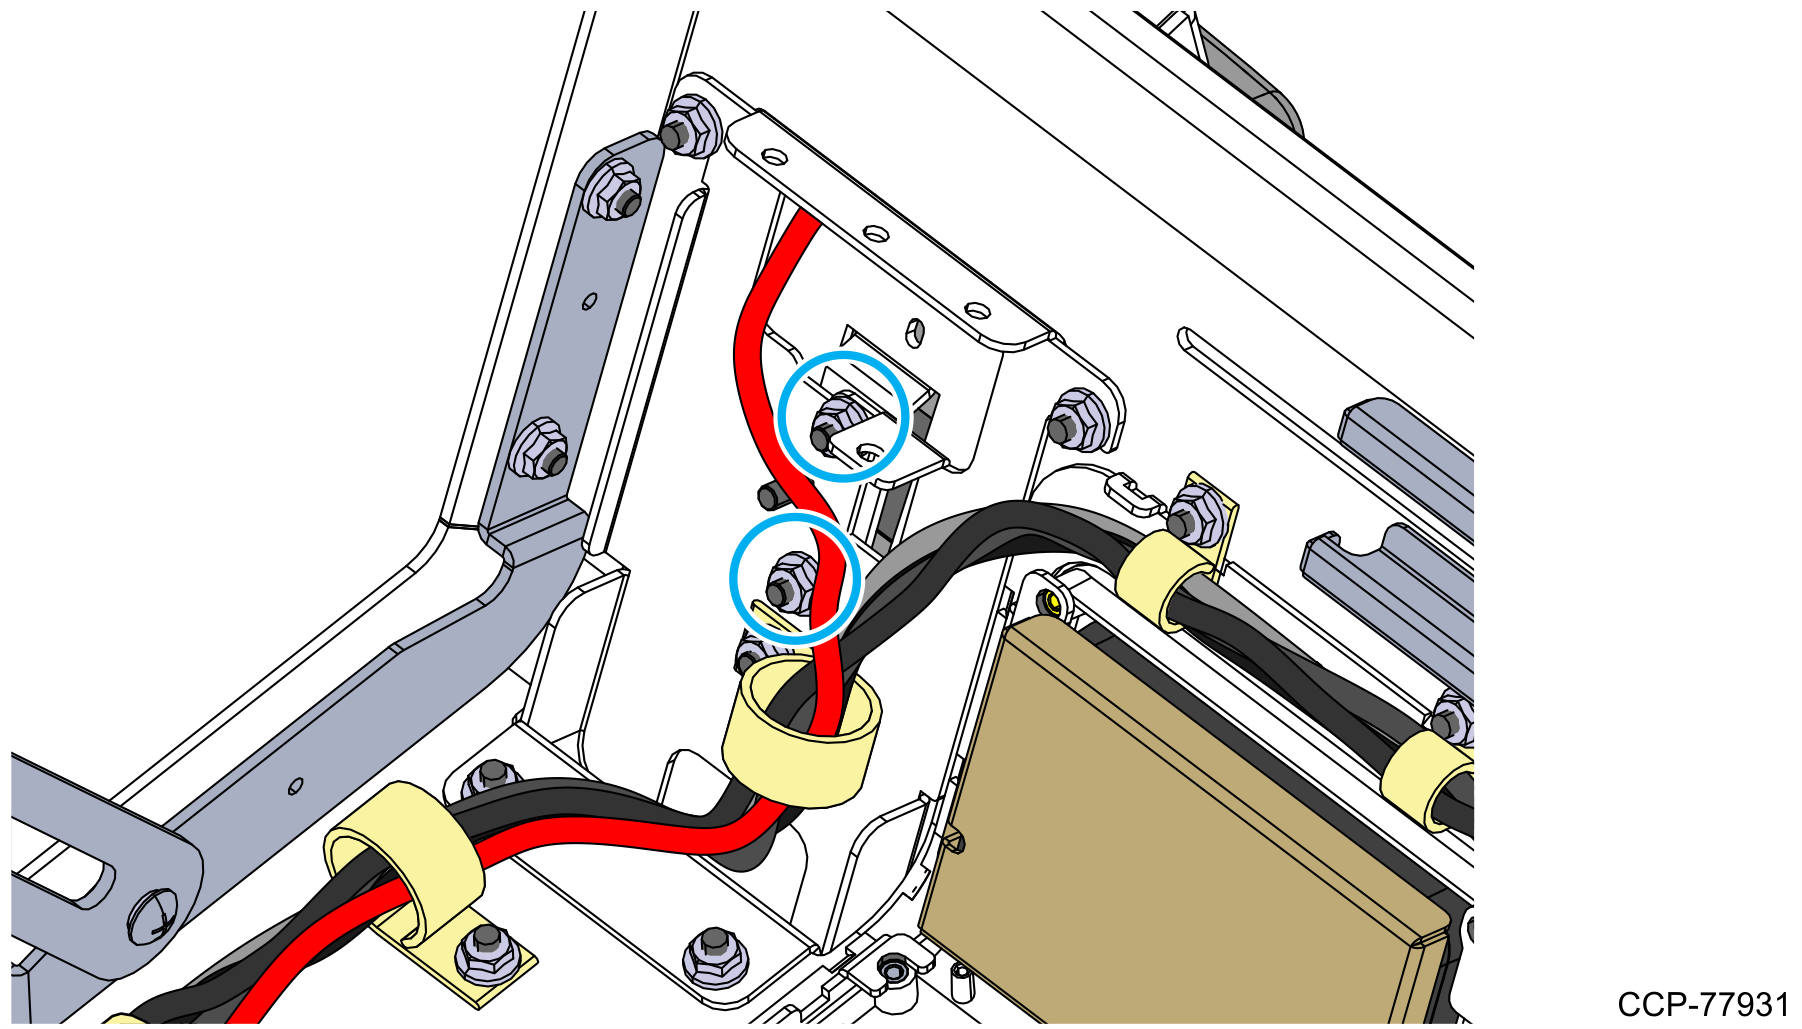
b.From the other side of the Payment Device Support Bracket, secure the PIN Pad Assembly using two M4 nuts.
5.Route and connect the PIN Pad Cable to the motherboard. For more information, refer to Routing the Cable for MSR and Small PIN Pads.